Beef Tenderloin Recipe for the Holidays

Beef Tenderloin Recipe for the Holidays

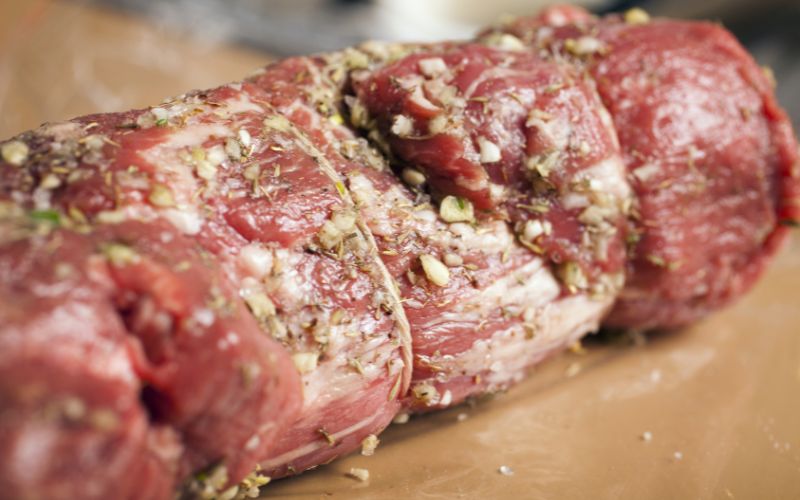
AFTER you have purchased your grassfed and grain finished beef from 10 Mile West Cattle Company, you will want to be sure to cook a Holiday meal worth remembering. What better gift for your loved ones than the best ever beef tenderloin meal, courtesy of Lisa Bryan of Downshiftology.

Holiday dinners revolve around lavish, splurgy mains, which is what makes them feel so special. And that my friends is what this beef tenderloin roast is all about. It’s ridiculously tender with a perfect medium-rare pink, coated in a garlic herb crust that adds a ton of flavor, and served with a creamy horseradish sauce that makes each bite so satisfying.

🤯 GET THIS RECIPE CARD & MORE HERE: Printable Recipe

GET THE LIST of EQUIPMENT HERE: Beef Tenderloin Roast

Follow Downshiftology:

Instagram: @downshiftology Facebook: Downshiftology
Pinterest: @downshiftology

As Seen in Northbay Business Magazine

As Seen in Northbay Business Magazine

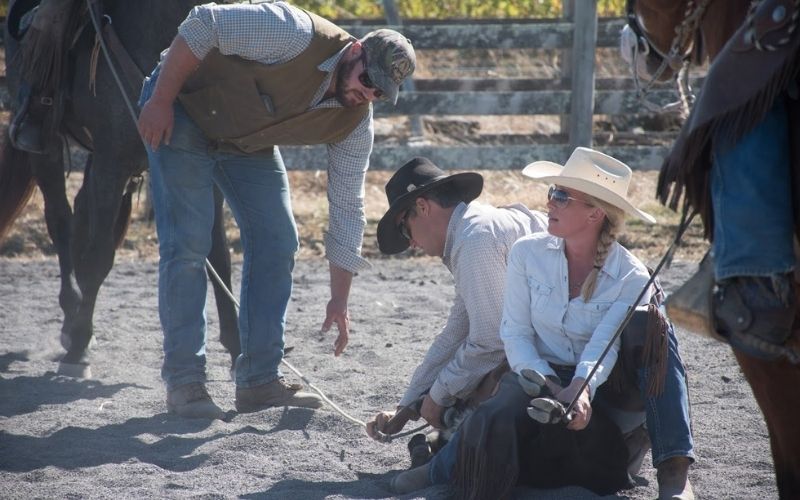
Jessica Rhoton, 36-year-old woman, mother of a toddler, partner of AJD Builders, and co-founder of 10 Mile West Cattle Company, has been a horse girl since the age of 10. “I went to a summer camp in Taylorsville, Calif. I will forever be grateful for that experience,” she says with a laugh. “Dave (the owner) was a thoroughbred racehorse breeder. Part of the camp had a horse aspect to it, and I completely gravitated to it. I’ve felt connected to horses ever since.”

As a young adult, Rhoton trained horses full time in her hometown, Novato. Then, in 2015, her family experienced a devastating tragedy, and she was left feeling lost and empty. A friend invited Rhoton out to her cattle ranch, and everything changed. “The first time I ever galloped across a field on horseback, chasing after a herd of cattle was life-changing,” says Rhoton. “It was so wild and free.” She adds, the connection I felt with that horse, and the trust we had to have in each other, changed everything for me.
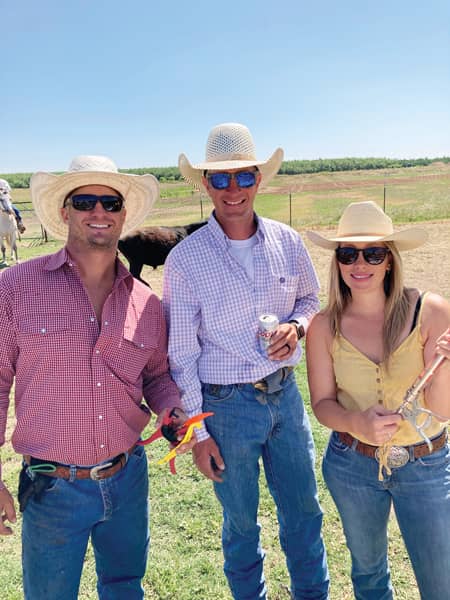
Adam Diaz, Robert Swift and Jessica Rhoton

From there, Rhoton attended several branding events at local cattle ranches. This is where the ranch owner gathers the cows and calves, and doctors and marks the new calves to keep track of the herd. Rhoton, without a horse to rope on, began helping by working with the ‘ground crew.’ She felt a strong sense of community at these events and appreciated the way people supported one another. It was a lot of dusty, dirty work, says Rhoton. “You don’t get paid in cash. You get paid with friendship and food and drinks at the end of the day.”

While her love of horses brought her to the cattle industry, it was the fellowship that kept her there. “I fell in love with the community and appreciated the way people supported one another without asking for anything in return,” she says. “I wanted to continue to pursue the cattle industry on a small, local level.” In 2019, Rhoton and Adam Diaz founded 10 Mile West, a grass-fed beef company.

10 Mile West Cattle Company is operated from Rhoton and Diaz’s home ranch in Oakdale, Calif. The cattle spend time between the ranch in Oakdale and the plains of Nevada, where their business partner, Robert Swift, lives. The meat is frozen and sold direct-to-consumer, and clients can choose between a half or whole steer. This is a more sustainable alternative to grocery store meat, as it cuts out the trucking and refrigeration costs of transporting the meat to grocery stores. Instead, it’s sent directly to the home, getting to the customer quicker, and in turn, keeping fresh for a longer period of time.

Rhoton wears many hats, and balancing being a mom while operating AJD Builders and 10 Mile West has its challenges. She recalls having to ‘push’ a cow back into its pen, in the middle of a work day, after it tried to escape through a gap in the fence with her young son, Wiley, on her hip. I am often asked why I’m taking on so much, she says. “The answer is always that I’m passionate about all three.” She adds, “I’ve found that with good help, there are enough hours in the day.”

As for the future, Rhoton often thinks about the next generation of cowboys and ranchers. “If Wiley, wants to cowboy one day, that would be amazing. If he doesn’t, that’s okay too,” she says. But she hopes to instill a sense of community, hard work and connection to the land in the next generation. “I believe that change starts on the local level. When you live and ‘be’ in your own surroundings, you can influence and impact how you want that to look.” She dreams of creating a camp for neglected and underprivileged youth, where they could come to the ranch and learn to care for horses and connect with nature. “It would be a healing place for kids to come and feel peace,” she says.

In the meantime, Rhoton is excited to provide grass-fed, grain-finished protein for families and be a steward of the land though regenerative pasture management. “That’s right at the same level as waking up early and seeing the sunrise from the back of a horse, and that first cold draft after a long, dusty day in the branding pen,” she says. “They’re both equally great, but providing quality protein to families at a local level, and building back ‘main street’ is the mission. The rest of it is the silver lining.”

For more information, visit 10milewest.com.

[Lead photo courtesy of 10 Mile West]
Classic Sunday Pot Roast

Classic Sunday Pot Roast

Original recipe: TheStayatHomeChef.com

Classic Sunday Pot Roast is an easy to make comfort food that is hearty, filling, and can easily feed the whole family. This recipe will work for a classic oven braise as well as in a slow cooker or Instant Pot.
Prep Time15 mins
Cook Time3 hrs
Total Time3 hrs 15 mins
Course: Dinner, Main Course
Cuisine: American
Keyword: Pot Roast


Servings: 8 Servimngs


Calories: 680kcal

Ingredients

  • 1 3 to 5 pound beef roast chuck, round, or brisket
  • 2 teaspoons salt
  • 1 teaspoon black pepper
  • 2 tablespoons vegetable oil
  • 6 cloves minced garlic
  • 1 to 2 cups red wine*
  • 2 cups low sodium beef broth
  • 1/4 cup Worcestershire sauce
  • 2 large white onions cut into 2 inch chunks
  • 1 pound baby carrots
  • 1 pound red potatoes cut into bite-sized chunks
  • 1 sprig fresh rosemary

Instructions

  • Preheat oven to 350 degrees F. Get a large oven safe dutch oven pot heating over high heat.
  • Season both sides of chuck roast with salt and pepper. Add vegetable oil to pot and sear roast until browned, about 3 to 4 minutes each side.
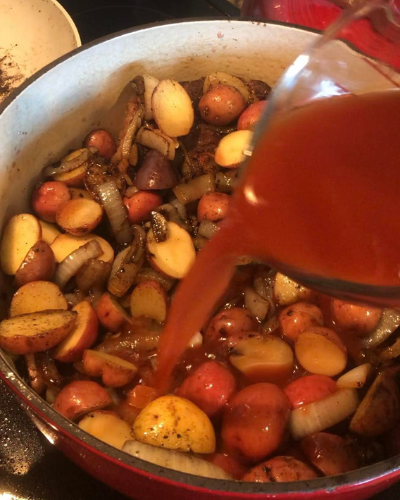
  • Remove roast from pan and set aside briefly on a plate or cutting board. Add garlic to pot and saute 60 seconds. Deglaze  pan with red wine and beef broth. Add roast back to the pot.
  • Pour Worcetershire sauce over roast and place the onion chunks, carrots, and potatoes on top of and around the meat. Place rosemary sprig on top.
  • Place a lid on the pan and transfer it to the preheated 350 degree oven. Cook 3 hours, or until meat reaches an internal temperature of 202 degrees F and shreds easily with a fork. Season vegetables with additional salt and pepper to taste and serve hot.

Notes

*You can replace the wine with either more beef broth OR grape juice. Use up to 2 cups for a larger roast. 

SLOW COOKER INSTRUCTIONS: Season the roast with salt and pepper as directed in step 2 of the recipe. Searing in oil in a skillet is an optional step. Place the seared or un-seared meat directly into a slow cooker. Add in all remaining ingredients and cook on low 8 hours.

INSTANT POT ELECTRIC PRESSURE COOKER INSTRUCTIONS: Follow this recipe as directed, but instead of searing and baking the roast in a large pot, you’ll do all of this in your pressure cooker. Sear the roast as directed in step 2 using the sear setting on your electric pressure cooker. Cook the garlic, and deglaze the pan with liquids, and add in vegetables. Cook on high pressure for 60 minutes, followed by a 15 minute natural release. Then, switch the release valve to the venting position. Remove lid once steam has stopped coming out.

Nutrition

Calories: 680kcal | Carbohydrates: 21g | Protein: 57g | Fat: 36g | Saturated Fat: 17g | Cholesterol: 195mg | Sodium: 1063mg | Potassium: 1662mg | Fiber: 3g | Sugar: 6g | Vitamin A: 7865IU | Vitamin C: 11mg | Calcium: 99mg | Iron: 7.7mg
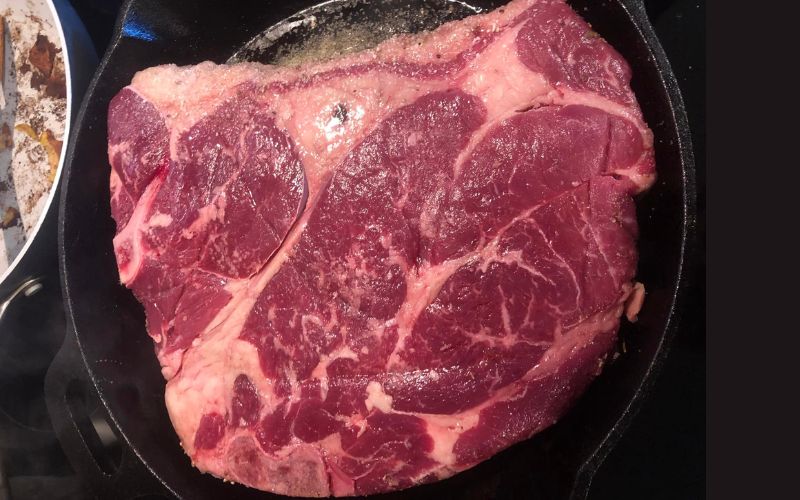
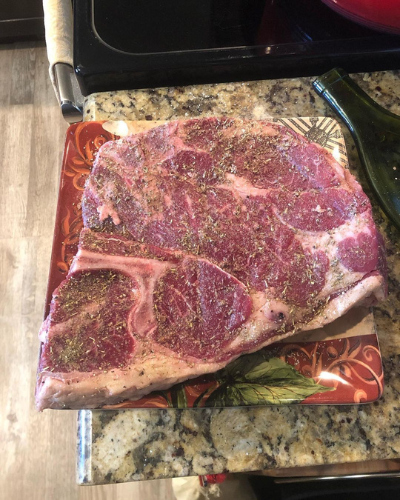
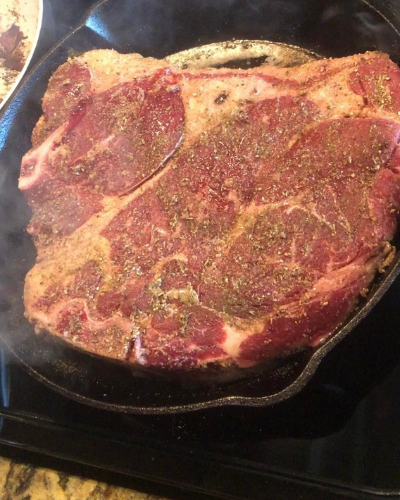
Chuck Roast
Chuck Roast
Chuck Roast
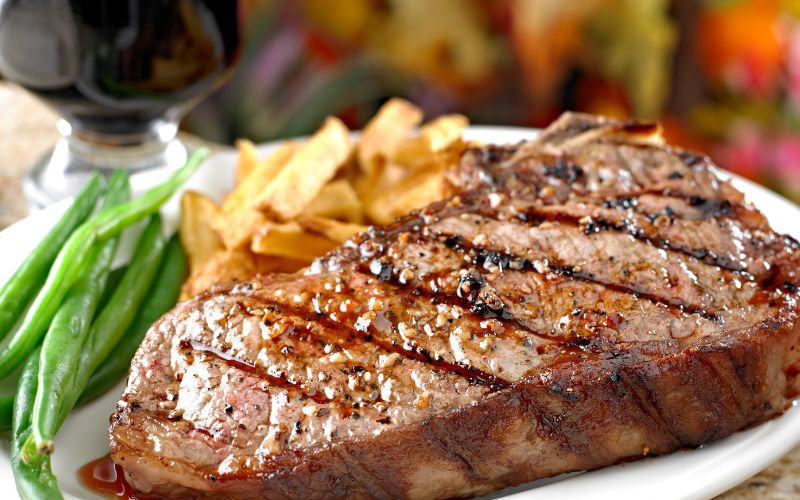
Tips for Grilling the Perfect Steak

Tips for Grilling the Perfect Steak

Authored by: David Rose, Omaha Steaks Executive Chef

Providing quality grassfed and grain finished beef to our consumers is our highest priority. Offering savory recipes and useful tips to best prepare our quality beef products is an equally high priority. We found the following article from Chef David Rose to be an extremely useful resource regarding grilling tips for the perfect steak experience.

Choose the Best Quality Beef

Not all steaks are created equal. For best grilling results, start with premium-quality steaks. Here’s why our beef is better:

Maximum Tenderness
Steaks should be aged at least 28 days, a careful process that creates the most tender steak possible. Then…they’re flash frozen and vacuum-sealed to stay that way.

Intense Flavor
The best grain-finished beef – hand selected for quality and marbling – the aging process and flash freezing will guarantee great beef flavor. 

True Safety
Quality beef products are handled in the cleanest, safest conditions anywhere, and we stand by our work.

Flash Frozen and Vacum Sealed
Freezing beef at home will damage its integrity and make it less juicy. However, flash freezing at processing and vacum sealing is proven to preserve the flavor and texture of your steak perfectly…until the moment you’re ready to cook it.

Consistency
Purchase from cattle companies utilizing master butchers who cut steaks…and that’s all they do. The individual attention means less exterior fat, zero imperfections, and guaranteed steak quality.

Five Steps to a Great Steak

If you’re ever lucky enough to eat one of Chef David Rose’s steaks, you’ll understand why it is all about the quality beef. But, as he’ll tell you, grilling great steaks isn’t rocket science. Follow Chef Rose’s “Five Steps to Grilling Great Steak” for steakhouse-worthy results at home.

1. Proper Preparation
Clean and pre-heat your grill on high. Make sure to oil the grill grates after cleaning. Prepare your steaks by patting them dry and seasoning before grilling. Use sea salt and freshly cracked pepper or a complete steak seasoning or rub. Wash your hands after seasoning the raw steaks. Then, determine your desired doneness before placing the steaks on the grill. (Steak Cooking Chart)

2. Searing
Sear the outside of your steaks over high heat and avoid moving them before they are ready. The steaks will release from the grate once the crust has developed. This helps with the flavor, texture and juiciness of the steaks. When handling steaks on the grill, use tongs or a spatula to turn your meat on the grill, as poking with a fork can damage the meat. Always wash utensils used on raw meat before touching cooked meat, or keep separate utensils for your cooked steaks.

3. Controlling Your Cook
Close your grill cover as much as possible while cooking to maintain a temperature around 450°F. This helps lock in flavor and prevent flare-ups. For timing, use the 60/40 grilling method. Grill for 60% of the time on the first side, then grill for 40% of the time after you turn over the steaks. This will give you an evenly cooked steak (Steak Cooking Chart).

4. Rest
After grilling, place your finished steaks on a clean plate. Never put cooked steaks on the plate you used to bring raw steaks to the grill without thoroughly washing it first. Allow your steaks to rest for at least 3 to 5 minutes. This will help the juices redistribute for the best-tasting and juiciest steaks. Garnish your steaks and serve with style…a little effort goes a long way. Add colors, textures, and flavors to make your perfectly grilled steak even more memorable.

5. Eat, order more 10 Mile West Steaks, and repeat!

Braised Beef Short Rib Taco

Braised Beef Short Rib Taco

We are always looking for top notch recipes using grassfed and grain finished beef. The following is a gem we discovered on The Wellness Blog of DiscoverGrassfedBeef.com. We hope you enjoy it as much as we did!

Recipe By: Kevin Rutherford | Lets Truck

Serves: 4

Prep Time: 30 min

Cooking Time: 3 hrs

Total Time: 3 hrs 30 min

USWM Shopping List: Beef Short Ribs, Pepper Jack Cheese

INGREDIENTS

Beef Short Ribs

  • 1 Pound Beef Short Ribs
  • Kosher salt
  • Avocado Oil
  • 1 Spanish onion, cut into 1/2-inch pieces
  • 1 rib celery, cut into 1/2-inch pieces
  • 1 carrot, peeled, cut in 1/2 lengthwise, then cut into 1/2-inch pieces
  • 1/2 cup chopped green chilis (Hatch preferred)
  • 2 cloves garlic, smashed
  • 1/2 cups tomato paste
  • 1 cup hearty red wine
  • 1/2 cups water
  • 1 bunch fresh thyme, tied with kitchen string
  • 2 bay leaves

Cold Toppings

  • 1 cup chopped cabbage
  • 1 1/2 cup chopped red onion
  • 2 1/2 cup chopped tomato
  • 3 3 Tbsp Chopped fresh cilantro
  • 4 3 Tbsp Avocado Oil
  • 5 2 Tbsp Lime juice
  • 6 Salt to taste
  • 7 Garnish
  • Shredded pepper Jack Cheese

INSTRUCTIONS

Braised Short Ribs

  1. Season each short rib generously with salt. Oil a dutch oven large enough to accommodate all the meat and vegetables with avocado oil and bring to high heat. Add the short ribs to the pan and sear well, about 2 to 3 minutes per side.
  2. Preheat the oven to 300 degrees F.
  3. While the short ribs are searing, combine all the vegetables and garlic in the food processor pulse to a thick puree. When the short ribs are seared, remove them from the pan. Add the pureed vegetables. Season the vegetables with plenty of salt and brown until they are dark. Add the tomato paste. Brown the tomato paste for 4 to 5 minutes. Add the wine and scrape the bottom of the pan. Lower the heat if things start to burn. Reduce the mixture by half.
  4. Return the short ribs to the pan and add 2 cups of water or until the water has just about covered the meat. Add the thyme bundle and bay leaves. Cover the pan and place in the preheated oven for 2 hours. Check periodically during the cooking process and add more water, if needed. Turn the ribs over halfway through the cooking time. Remove the lid during the last 20 minutes of cooking to let things get nice and brown and to let the sauce reduce. When done the meat should be very tender but not falling apart.

Cold Toppings

  1. Mix all ingredients in a bowl and salt to taste.
  2. I use both soft and hard grain-free taco shells from Siete Foods or Thrive Market
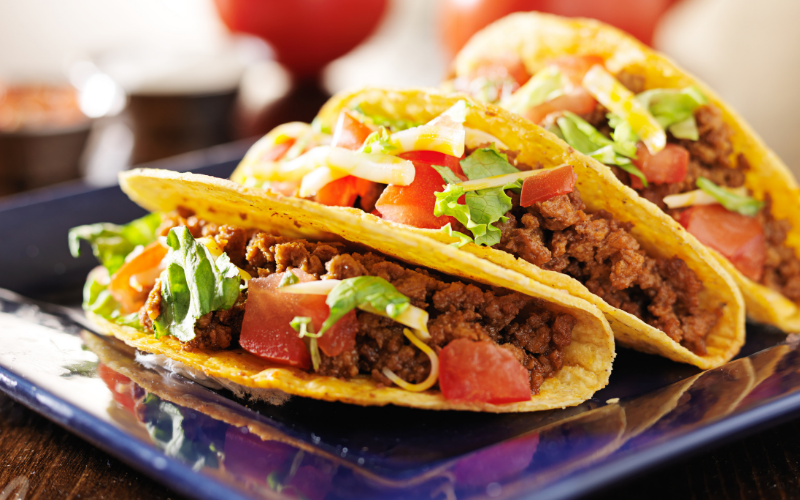
  3. Load up your taco shells with hot and cold toppings and garnish with shredded pepper jack cheese


Follow along with more tasty recipes on our Discover Blog.

Kevin Rutherford

Kevin Rutherford

Kevin Rutherford has been involved in the trucking industry his entire life. He bought his first truck when he was 22 years old. He is a Certified Financial Planner, Functional Nutritional Therapy Practitioner and host of the wildly popular Trucking Business & Beyond Sirius XM radio show. He’s helped thousands of truck drivers to help them improve their business and health. Kevin has also developed the NDK (Nutrient Dense Keto) Diet to help drivers stay healthy on the road.